


Installing Wall-Mounted EHR Workstations? Here are 6 simple steps to ensure success
It’s true that wall-mounted EHR workstations can reduce nursing fatigue and enhance patient engagement. But before you embark on a new roll-out, remodel, or a hardware refresh, you’ll want to consider these six steps in your project plan so you get the best clinical workflow and ensure the project’s success.
1. One size does not fit all
Consider the room’s layout and clinical workflow
The room’s physical layout and clinician workflow vary by department and from room to room. Permanently mounting a wall arm without planning for patient traffic and clinician workflows can create more bottlenecks than it solves. Before you start, do a formal pre-planning Clinical Device Assessment that studies the day-to-day clinical workflow with input from nurses and clinicians to guide your implementation plan.
2. Determine the ideal mounting location
Structural planning avoids installation issues
Without pre-planning, a wall-mounted unit might hinder face-to-face engagement. The headboard wall toward the door side of the bed offers the best location, but existing devices might occupy that space. The other three walls can be used if the wall arm offers sufficient swivel for face-to-face engagement. When mounting on side walls or the wall at the foot of the bed, you can leverage arms with articulation to rotate to face the patient. Check the stud locations where you plan to install the track. Otherwise, a backer board is required to span adjacent wall studs to secure the track. You will also need to locate electrical and data outlets to determine if they need to be added or relocated. This process is critical to making sure the project plan stays on schedule.
3. Computing Peripherals
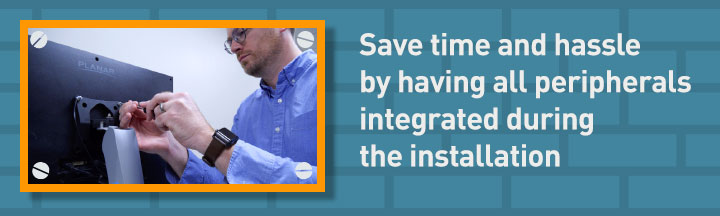
Getting the integration completed
Once the arm is securely mounted, the computing peripherals need to be integrated. In addition to the PC and display, the wall arms accommodate a full range of peripherals, including keyboard, mouse, barcode scanner, label printer, and badge reader. Your IT team may be able to manage the integration, but a system integrator can manage this during a turnkey installation saving time and hassle. They unbox the equipment, connect all peripherals and make needed adjustments, manage and conceal cables, then disposal of packaging to get your patient rooms ready sooner.
4. Coordination
Get multiple parties working in sync
To get the installation/integration completed, multiple people and departments must be coordinated, including clinicians, IT staff, hospital administrators, facilities maintenance, and even outside contractors. Often a turnkey installation/integration team performs the installation, followed up by Environmental Services to clean the room. Choosing a wall arm manufacturer that offers turnkey installation can streamline the process, save valuable time and eliminate expensive errors. Even if this is your second or third roll-out, working with a partner who has a track record involving hundreds of roll-outs can keep your downtime to a minimum and get your rooms ready for patient care sooner.
5. In-room Installation
Credentialed installers understand your clinical needs
Unless installers are working with new construction, the installation team will need to work within the patient population. Even if the installation space is empty, installers will still encounter patients and clinical staff. Insist on proper credentialing like Vendormate and hospital experience with HIPAA training for your installers. Additionally, with COVID-19, make sure infection control (HAIs) protocols are followed for the equipment.

6. Support
Keep your capital investment in good shape
Hospitals place heavy demands on medical equipment – especially wall arms. When a wall arm waits for repair, patient rooms can become unavailable which impedes clinical workflows and hospital revenue. Select a partner with a robust warranty plan coupled with regular maintenance programs to keep your wall arms up and running, year after year.